
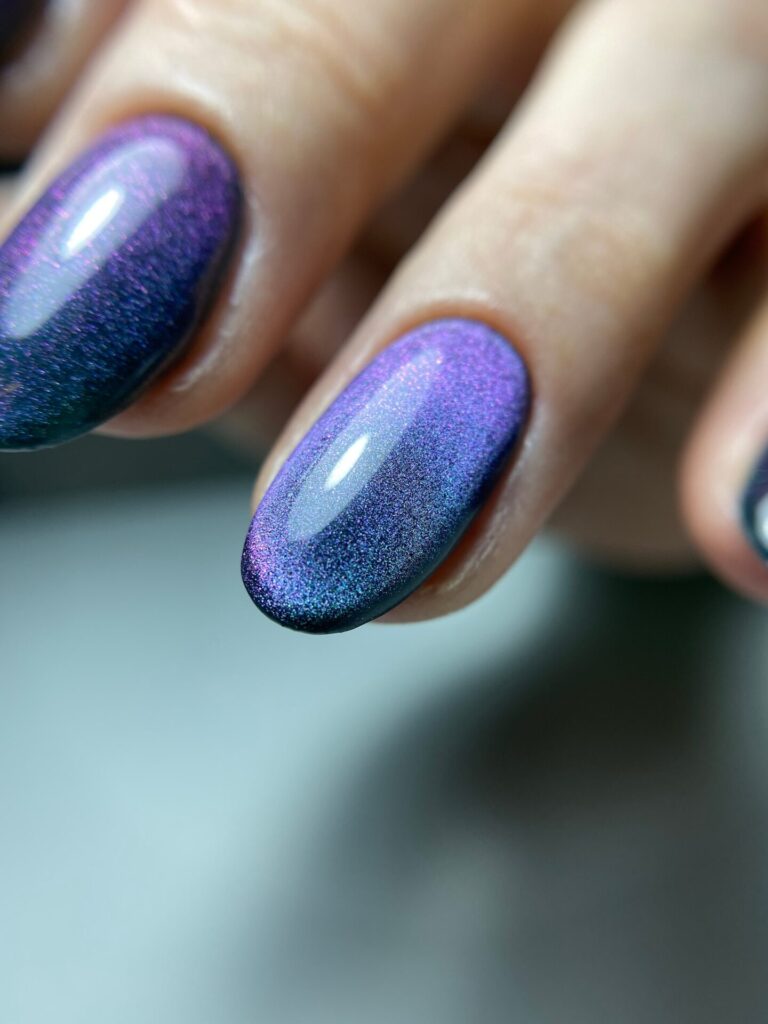
Cat eye gel polish creates one of the most striking effects in modern nail art: a shifting band of light that moves as your hand moves, just like the gemstone it’s named after. The effect comes from magnetic particles, tiny iron particles suspended in the gel, which respond to a magnet held over the wet polish before you cure it under a UV/LED lamp. Once you understand how the magnet, the particles and the timing work together, cat eye nails are surprisingly achievable at home. This guide covers everything from choosing your magnet to French tips, BIAB bases and fixing common problems.
Cat eye gel polish is a gel polish infused with magnetised iron particles. When you hold a magnet close to the uncured polish, the particles pull towards it and line up into a concentrated band or shape. Curing the polish under a UV/LED lamp then locks the particles permanently in place, which is why the effect never fades or shifts once set. The result is a luminous streak of shimmer that appears to move as the nail catches the light. The stronger the magnet and the darker the base beneath it, the more dramatic the final effect.
You only need a handful of items, and most of them will already be in your gel kit:
That’s it. If you already do gel nails at home, the only new purchases are the cat eye polish itself and the magnet.
This is the step most guides skip, and it’s the one that makes the biggest difference to your results. The shape and strength of your magnet directly control the pattern you create. A magnet is not just a magnet.
| Magnet shape | Pattern it creates | Best for |
| Flat bar magnet | A single straight band of light across the nail | Classic cat eye stripe, diagonal effects |
| Circular / round magnet | A soft halo or starburst radiating from a point | Galaxy and aurora effects |
| Double-ended magnet | Two parallel bands or a split effect | Double cat eye, symmetrical designs |
| Flower / shaped magnet | Petal or patterned particle arrangement | Decorative accent nails |
| High-power Neodymium magnet | Sharper, brighter, more defined lines | Velvet cat eye, crisp French tips, stubborn polishes |
A few practical rules. Stronger magnets (Neodymium) pull particles faster and produce a tighter, brighter line, so hold them for less time. Weaker magnets need longer holds and closer positioning. The angle matters too: holding a bar magnet diagonally across the nail gives the flattering elongated stripe you see on salon nails, while holding it horizontally gives a straight band across the middle.
Do you need a special magnet? Yes. Nail magnets are engineered to be strong enough to move particles through viscous gel at a short distance. A fridge magnet is far too weak and will leave you with a dull, undefined shimmer.
File your nails to shape, gently buff the surface to remove shine, push back your cuticles and cleanse each nail with a lint-free wipe. Good adhesion starts here. If you want the full routine, our gel nail prep guide covers it in detail.
Apply a thin, even layer of base coat, cap the free edge, and cure fully under your lamp according to the manufacturer’s timings.
Here’s the part most tutorials gloss over. The magnetic particles in cat eye polish are reflective, and reflection needs contrast to be visible. Over a black, navy or deep plum base, the dark backdrop absorbs light everywhere except where the particles are concentrated, so the magnetic band appears to glow intensely against it. Over a nude or sheer base, the surrounding nail reflects light too, so the band reads as a soft, subtle glow rather than a sharp beam. Neither is wrong. Dark bases give drama; sheer bases give an elegant, wearable shimmer. Once your base is on, you can pair it with any of our cat eye gel polish colours to suit the look you’re after. Apply one to two coats of your chosen base colour and cure.
Apply one coat of cat eye gel polish to a single nail. This is important: work one nail at a time, because the polish must still be wet when you magnetise it. Do not cure yet.
Hold the magnet 3 to 5 millimetres above the wet polish, without touching it, for 5 to 10 seconds. You’ll see the particles visibly draw together into a band. Angle the magnet diagonally for an elongated stripe, hold it flat for a horizontal band, or use the shapes from the magnet table above for halos and split effects. Not happy with the line? Simply brush over the nail with another thin coat of polish to reset the particles and try again.
The moment the pattern looks right, cure it. Any delay lets the particles drift. Getting the cure right matters more with cat eye than with standard colour, so if you’re unsure about lamp timings, our guide to curing gel polish is worth a read. Once every nail is patterned and cured, finish with top coat. Here’s a differentiating tip: a glossy top coat amplifies the light-catching, gemstone quality of the effect, while a matte top coat transforms it into a soft, suede-like velvet cat eye. Same polish, two completely different looks.
Once you’ve mastered the basic band, the magnet becomes a design tool. Referring back to the magnet matrix above:
Experiment on a nail swatch stick first. Because you can reset the polish before curing, there’s no penalty for playing.
Cat eye French tips are one of the fastest-growing variations of this look, and the method is simple once you know the magnet trick.
Start with a sheer or nude base, applied and cured as normal. Then, instead of covering the whole nail, paint the cat eye gel polish only across the tip in a smile line, exactly as you would a traditional French tip. While the tip is still wet, hold a bar magnet (a strong Neodymium bar works best here) parallel to the free edge, following the curve of the smile line, for around 8 to 10 seconds. The particles gather into a bright, curved band of light that traces the tip. Cure immediately.
For colour combinations, emerald, sapphire and deep burgundy tips over a milky nude base are the most requested pairings, and silver or champagne cat eye tips give a softer bridal take. The contrast between the flat, sheer base and the shifting metallic tip is what makes this design so effective. (LINK PENDING: cat eye French tip designs spoke, suggested slug /cat-eye-french-tip-nails/, page does not yet exist)
BIAB (or Builder Gel) is now the go-to format for UK home and salon nails, and cat eye works beautifully over it, with a few adaptations.
First, prep. A cured builder gel base is harder and smoother than standard gel polish, so buff it lightly and wipe away the dust before applying colour, otherwise the cat eye layer can struggle to grip. Second, structure. Apply your BIAB, build your apex and cure fully as normal, then treat the cured builder layer as your foundation: dark colour coat, cure, then cat eye polish on top. The magnetic particles move within the cat eye layer itself, so the firmer base underneath doesn’t restrict the effect; if anything, the perfectly smooth BIAB surface helps the band form cleanly. Finally, curing. Builder gels often need longer cure times than polish, so follow the timings for each product separately rather than assuming one setting fits all. If you’re new to builder gel formats, our guide to what builder gel is and how BIAB works covers the basics, and the Sculptify application guide walks through building the base layer step by step.
Layering is how you go from a nice cat eye to a salon-level one, and there are three techniques worth knowing.
Double application. Apply your first coat of cat eye polish, magnetise, and cure. Then apply a second coat, magnetise again in the same position, and cure. The second pass sits over a locked-in first layer, so you get a deeper, more three-dimensional band with far more control, because the first layer can’t shift while you work.
Tinted sheer overlays. Applying a sheer tinted gel over a cured cat eye shifts its entire colour temperature. A sheer pink over a silver cat eye creates a rose-gold effect; a sheer blue over green creates teal. It’s an easy way to multiply one polish into several looks.
Mixing two cat eye colours. Apply two shades side by side on the wet nail, then magnetise once. The particles from both draw into a single band with a gradient running through it, an effortless ombre effect. For shade pairings that blend well, the Nebula Collection was designed with exactly this kind of layered, cosmic effect in mind. (LINK PENDING: cat eye ombre spoke, suggested slug /cat-eye-ombre-nails/, page does not yet exist)
The magnet was either too far from the nail, not strong enough, or the polish was cured before magnetising. Hold the magnet 3 to 5 millimetres above the wet polish for a full 5 to 10 seconds, and check you’re using a nail-specific magnet. Never cure first: cured particles cannot move.
Clumping means the magnet was held too close or for too long, dragging particles into a blob rather than a band. Apply a thin fresh coat to reset the particles, then re-magnetise from slightly further away and stop the moment a clean line forms.
Two usual causes. Either the top coat brush physically smudged the particles because the cat eye layer was under-cured, or your lamp isn’t curing fully. Cure the cat eye layer for the full recommended time, check your lamp bulbs, and float the top coat on gently.
This happens when you paint several nails before magnetising any of them. The polish begins to settle and the particles drift, so each nail responds differently. Work strictly one nail at a time: paint, magnetise, cure, then move to the next.
Cat eye gel polish lasts exactly as long as the gel system underneath it, typically two to three weeks over standard gel polish and three to four weeks over BIAB. The magnetic effect itself never fades, because curing locks the particles in place permanently. Longevity comes down to prep and aftercare: cap the free edge on every layer, avoid soaking your hands for long periods in the first 24 hours, and oil your cuticles daily.
The effect comes from magnetic iron particles inside cat eye gel polish. Apply the polish, hold a nail magnet a few millimetres above the wet surface for 5 to 10 seconds so the particles draw into a band of light, then cure under a UV/LED lamp to lock the pattern in place permanently.
Yes. Cat eye effects require a nail-specific magnet strong enough to move iron particles through thick gel at a short distance. Household or fridge magnets are far too weak and produce a faint, undefined shimmer. Bar magnets create stripes, round magnets create halos, and strong Neodymium magnets give the sharpest lines.
Not really. Regular polish air-dries slowly and unevenly, so magnetised particles drift out of position before the polish sets, and standard polishes don’t contain magnetic particles anyway. For a true, lasting cat eye effect you need cat eye gel polish cured under a UV/LED lamp, which freezes the pattern instantly.
Start with one nail at a time and a simple bar magnet. Paint the nail, hold the magnet 3 to 5 millimetres above the wet polish for a few seconds, and cure straight away. The most common beginner mistake is curing before magnetising, so remember: magnet first, lamp second.
No. If you can apply gel polish, you can do cat eye nails. The only skill is timing: magnetise while the polish is wet and cure immediately afterwards. If a pattern goes wrong, apply a thin fresh coat to reset the particles and try again before curing. See the troubleshooting section above for quick fixes.
Returns:
nails@kirstymeakin.com
Kirsty Meakin,
42 Winpenny road,
Park House Industrial Estate,
Newcastle Under Lyme,
ST57RH
