
If you want nails that stop people in their tracks, this is the kind of set that does it. Long, sharp, structured, and packed with detail. This is a full watch-me-work style nail design combining clear acrylic, acrygel, ink detailing, encapsulated glitter, crystals, and dramatic 3D art.
The standout feature is how builder gel techniques can be combined with acrylic and acrygel systems to create a clean, crisp finish with long-lasting structure.
This is nail architecture with attitude. And if you want to watch the video tutorial check it out here.
Builder gel is often associated with overlays and strengthening natural nails, but it also plays a powerful supporting role when used alongside acrylic and acrygel.
When you combine systems properly, you get the best of both worlds:
Many nail techs assume you have to stick to one system. You don’t. Combining acrylic and gel-based systems can elevate a set massively, as long as you prep and layer correctly.
This set starts with sculpting forms.
Instead of ripping the end off to shorten them, forms with a perforation line allow you to adjust length cleanly. That makes them far more flexible and practical, especially when switching between long and medium sets.
For this design, the nails are going long.
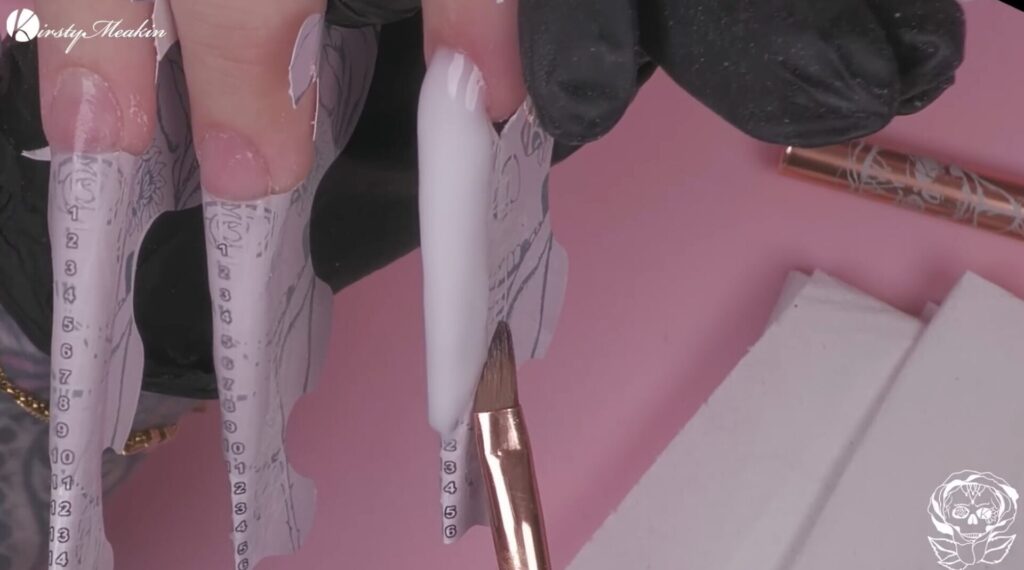
Before applying any new product, the base nails need to be flawless.
Even though the nails are short and square at this stage, shaping and filing comes first. The goal is to create a perfect foundation before building a longer design.
A metal centre board with replaceable file papers is ideal here because:
This is the stage where you fix imperfections early, instead of trying to correct them later with product.
Because this set uses acrygel, base coat is essential.
Base coat acts like a primer layer for gel-based systems. Without it, you risk adhesion issues, lifting, and separation between layers.
Unlike some acrylic systems, you do not need to apply primer before base coat when using acrygel. The base coat provides the adhesive layer needed for proper bonding.
A thin clear acrylic layer is applied first, extending across the nail and down the form.
This creates:
This clear acrylic base layer also helps ensure everything applied on top remains stable and sealed in.
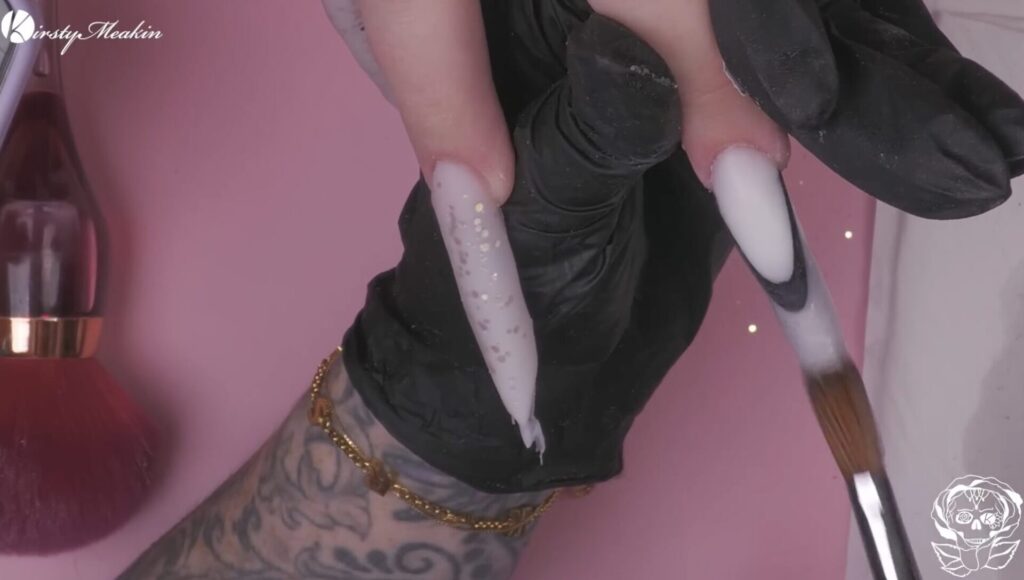
Now the fun starts.
Instead of building the entire nail with acrylic, acrygel is used to sculpt the French section. This is where acrygel shines, because it does not set until it’s cured in the lamp.
That means you can perfect the shape for as long as you like.
Unlike acrylic, where you have limited time before it hardens, acrygel allows you to:
Acrygel should be cured for:
Long nails naturally require thicker product, so longer curing is often needed.
The shape chosen here is a Russian almond, and it’s a favourite for a reason.
Russian almond gives:
Compared to stiletto, it provides a slightly broader surface while still looking sharp and aggressive.
If you love designs that look editorial rather than basic, Russian almond is the perfect shape.
Raw glitter is pressed directly into the sticky layer of the acrygel.
This works because acrygel leaves a tacky surface that acts like built-in adhesive. You can move glitter around and press it into place without needing extra glue.
If the glitter is difficult to control, you can apply a small amount of base coat first, but most of the time the sticky layer is enough.
This method avoids mess and keeps the glitter placement clean.
Next comes the encapsulation.
Clear acrylic is applied over the glitter to seal it in, creating a “sandwich” effect:
This technique locks everything together and prevents separation between systems.
It is also a brilliant way to create depth without adding bulk.
For this kind of nail design, the smile line cannot be soft. It has to be crisp.
A 100 grit file is used here because acrygel is softer than acrylic, so it files cleanly and quickly.
You can also use:
If you were filing a smile line made entirely of acrylic, you would usually need a tougher grit to get that sharp edge.
One of the smartest techniques in this set is using ink to create a 3D French effect.
Most nail techs assume you need gel polish for this type of detail. You don’t.
Using ink allows you to create a super fine, crisp line without adding bulk or build-up. That means you can achieve definition while keeping the nail sleek.
Applying the black ink first also ensures that even if you miss tiny areas, the line stays sharp and consistent.
To create depth, black acrylic is applied at an angle under the French area.
This creates a shadow effect so when light hits the clear acrylic, it reflects through and makes the smile line look even sharper.
It gives the illusion of layers and dimension, which is what separates a basic French from a high-end design.
This set is a double French, and the depth makes it look expensive.
Once the second smile line is filed crisp, acrygel is applied again using marshmallow white.
The product is pulled right up into the sides to maintain structure and ensure the nail looks clean from every angle.
If the brush starts sticking, slip solution is used to keep control.
Some nail techs also use acrylic liquid as slip solution, particularly when working near the free edge, to avoid getting monomer around the skin.

Once glitter is pressed into the sticky layer again, everything is encapsulated using clear acrylic.
This gives:
At this stage the nails already look unreal, but the detailing is still to come.
Hand filing gives the structure, but the e-file takes it to the next level.
A de-bulk bit is used at around 30 to 35 RPM with very light pressure.
The key is speed and control. You let the bit glide across the product. If you press hard, you risk over-filing and ruining the structure.
This is where builder gel-level refinement comes in, even if the nail is primarily acrylic and acrygel.
To make the set more interesting, the colours are reversed on the second hand.
So:
This is an underrated design trick. It keeps symmetry without looking repetitive.
A super-white gel polish is used to sharpen the smile line even further.
This matters because not all whites are the same.
Marshmallow white acrygel is softer and creamier. A bright white gel polish is cleaner and crisper. Using both creates contrast that elevates the finish.
Small details like this are what separate standard nail sets from professional-level work.
Crystals are applied using gummy gel.
The rule is simple:
Too much product causes overflow and creates a bulky “muffin top” effect around the gem.
The crystals are arranged in a cluster near the cuticle area, angled to match the Russian almond shape. This helps elongate the nail and keeps the design cohesive.
The cluster placement makes the crystals look like they are growing out from the nail, which is visually stronger than random placement.
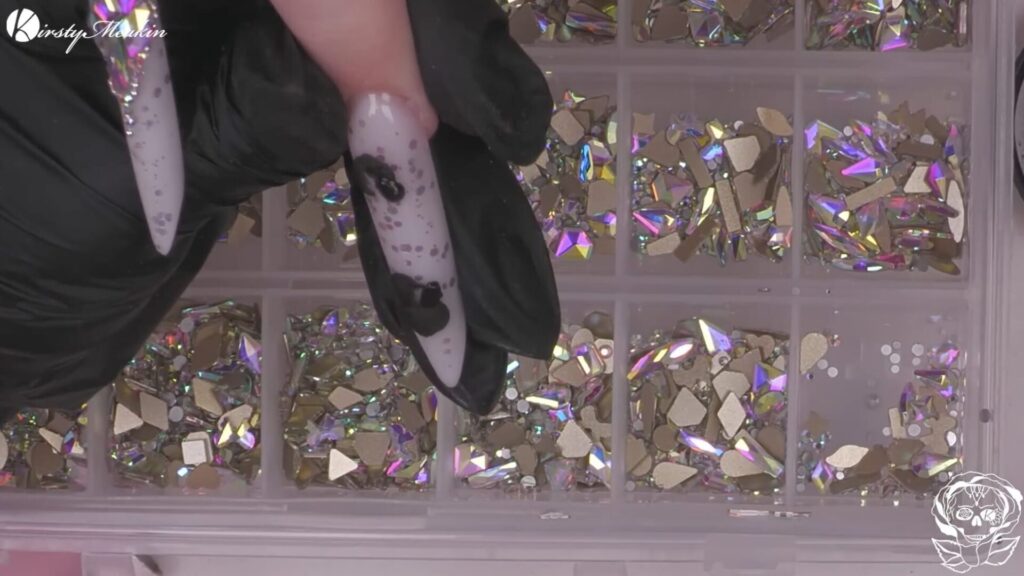
Now the statement feature.
Black acrylic is used to sculpt 3D flowers over the white nails, then the opposite is done on the alternate side.
The floral design is free-formed and shaped as it’s built, giving it an organic look. It has a slightly maple-leaf feel, with sharp edges and strong angles that match the Russian almond structure.
Small crystals and micro beads are placed inside the flower to make it look like jewellery embedded into the nail.
This is where nail art becomes wearable sculpture.
A glossy top coat with no sticky layer is applied.
This:
The finish is what makes everything pop.
Cuticle oil is applied to finish the set properly.
It hydrates the skin, completes the look, and gives that final salon-level polish.
Even though this set uses acrylic and acrygel heavily, it is exactly the type of design builder gel lovers appreciate.
It has:
If you want nails that look like luxury editorial work, this technique is a blueprint.
And the best part is that mixing systems allows you to work smarter. Acrylic for strength. Acrygel for control. Builder gel techniques for refinement and texture.
Monochrome, glitter, crystals, 3D florals.
Job done.
Returns:
nails@kirstymeakin.com
Kirsty Meakin,
42 Winpenny road,
Park House Industrial Estate,
Newcastle Under Lyme,
ST57RH
